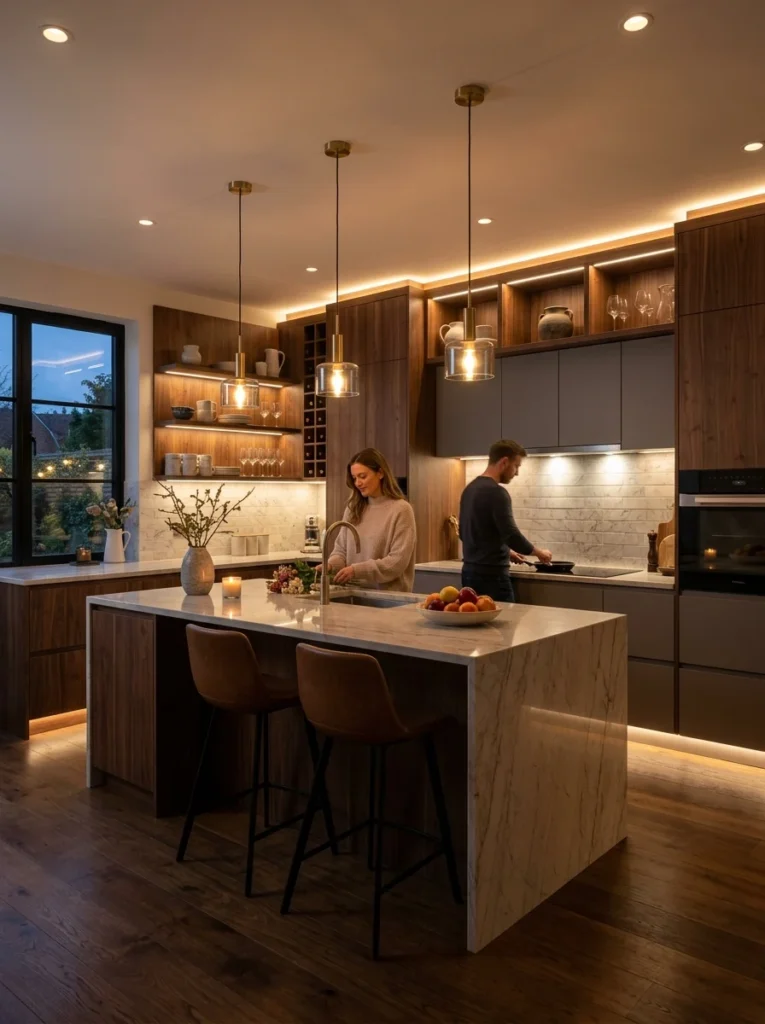
For the longest time my kitchen had exactly one light: a single bulb in the middle of the ceiling. I never questioned it. Then one winter evening I was chopping onions at the counter and realised I was working almost entirely in my own shadow, because I stood between that one ceiling light and the worktop, and my body blocked it. I’d been squinting at dinner prep for years and blaming my eyes. The problem wasn’t my eyes. It was that my kitchen had one light doing the job of about five.
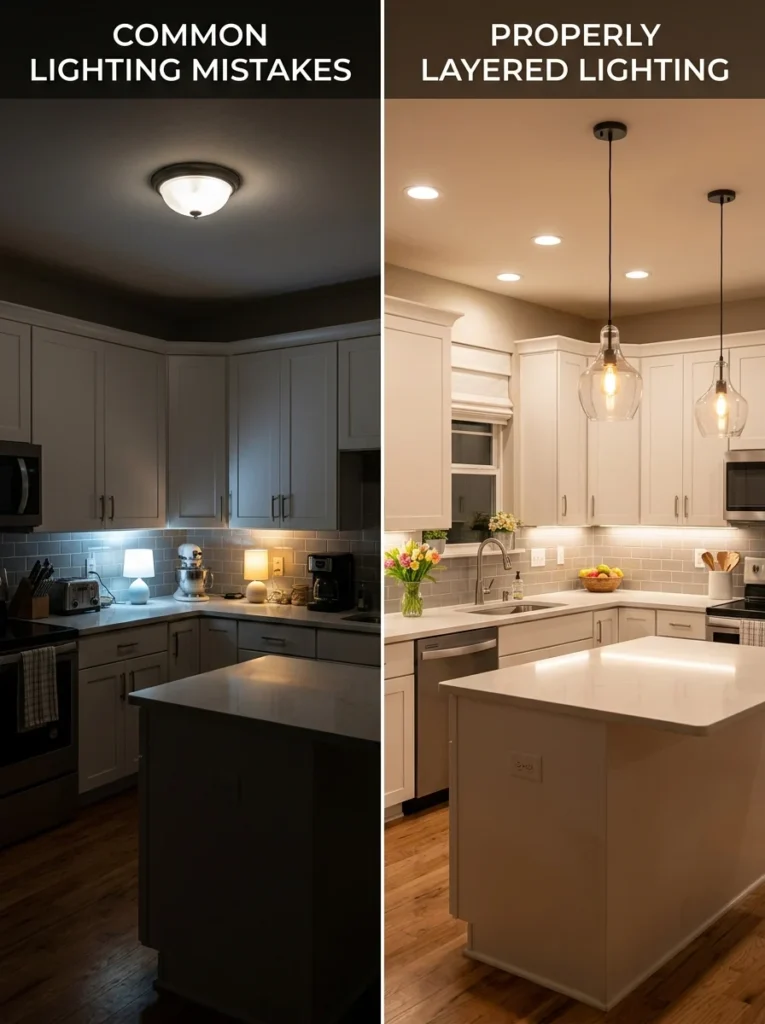
That’s the single most common lighting mistake there is, and fixing it changed how the room felt more than any expensive upgrade I’ve done since. Good kitchen lighting isn’t about one bright fixture. It’s about layers, several different kinds of light doing different jobs, so the room is well-lit for cooking, warm for eating, and flexible enough to shift between the two. Designers talk about three layers: task, ambient and accent. It sounds technical, but it’s genuinely simple once you see what each one is for, and you can improve any kitchen dramatically just by making sure all three are present. Let me walk you through them, plus the practical settings, the color temperature and brightness, that decide whether the whole thing feels right or harsh.
The three layers, and why one light is never enough
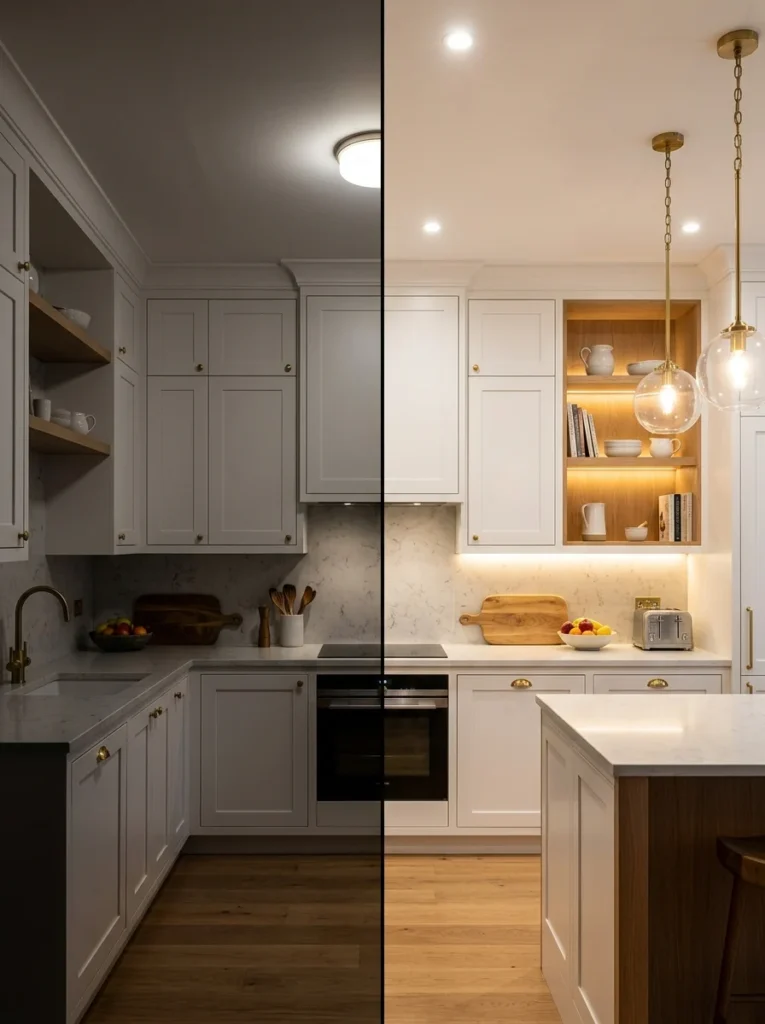
The reason a single ceiling light fails is that it tries to do three separate jobs and does none of them well. It can’t light your worktop properly because you stand in its way. It can’t create a warm mood because it’s one flat, bright source. And it can’t highlight anything, because it lights everything the same. Layered lighting solves this by splitting the work. Task light goes exactly where you do close work, so nothing casts a shadow on your hands. Ambient light fills the room evenly so there are no gloomy corners. Accent light adds warmth, depth and a bit of atmosphere. Put all three in, ideally on separate switches or dimmers, and you can make the same kitchen bright and functional at 7pm on a Tuesday or soft and inviting when friends are over. That flexibility is the whole point.
Layer one: task lighting
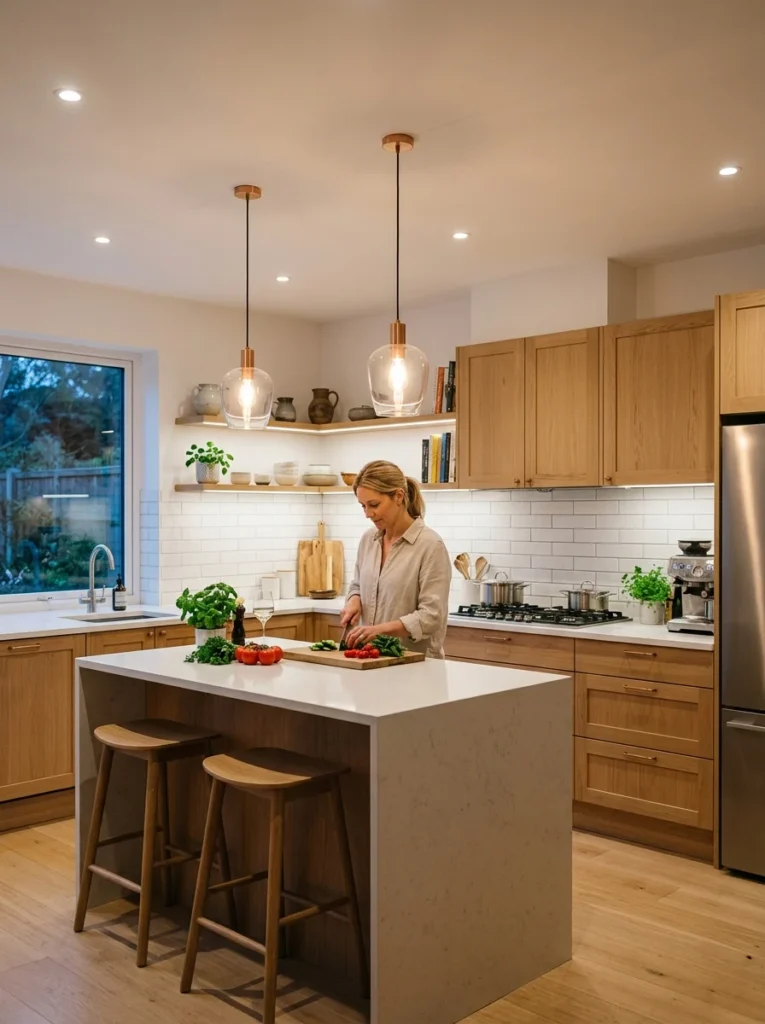
Task lighting is the most important layer and the one most kitchens are missing. It’s the focused light aimed directly at the surfaces where you actually work, so you can see clearly and never work in your own shadow. If you fix only one thing about your lighting, fix this.
Under-cabinet lighting
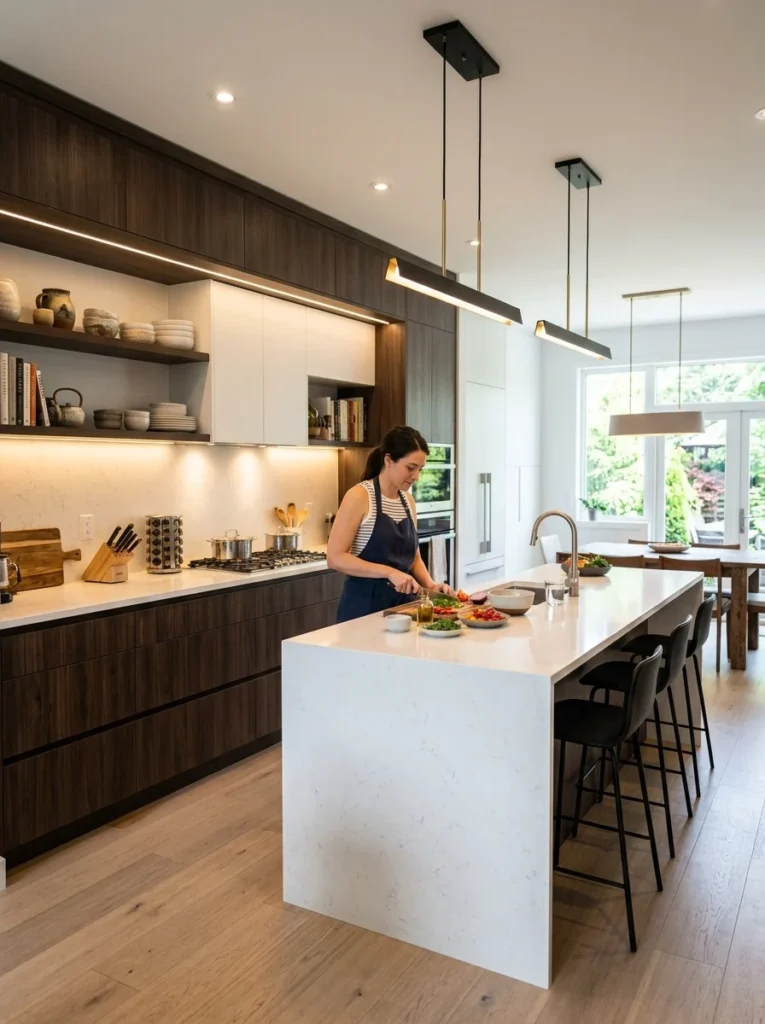
This is the single best lighting upgrade you can make, and it’s why. Your upper cabinets sit above your worktop and cast a shadow over exactly the surface you chop and prep on. A strip of light fixed underneath them, pointing down at the counter, throws that shadow away completely and lights your work directly. LED strips or slim bars are inexpensive, many peel-and-stick or plug-in versions need no wiring, and the difference is night and day. When I finally added under-cabinet strips, the transformation was so stark that I felt slightly foolish for having lived without them for years. If you do nothing else from this whole guide, do this.
Lighting over the sink and hob
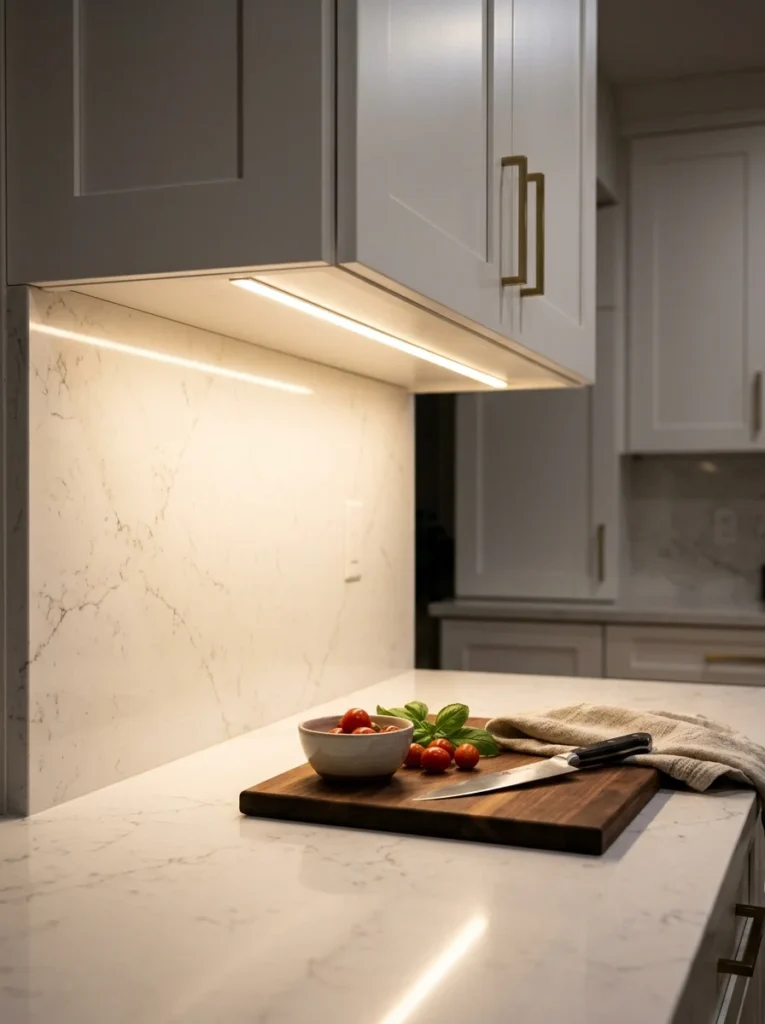
The sink and the cooker are two more spots where you’re often standing with your back to the main light, working in shadow. A dedicated light over each, a small recessed downlight or a pendant over the sink, and the light built into a decent extractor hood over the hob, means you can actually see what you’re washing and cooking. People forget the sink especially, and then wonder why washing up in the evening feels like a chore done in the dark. A little targeted light there makes a surprising difference to a job you do every single day.
Lighting over an island or table
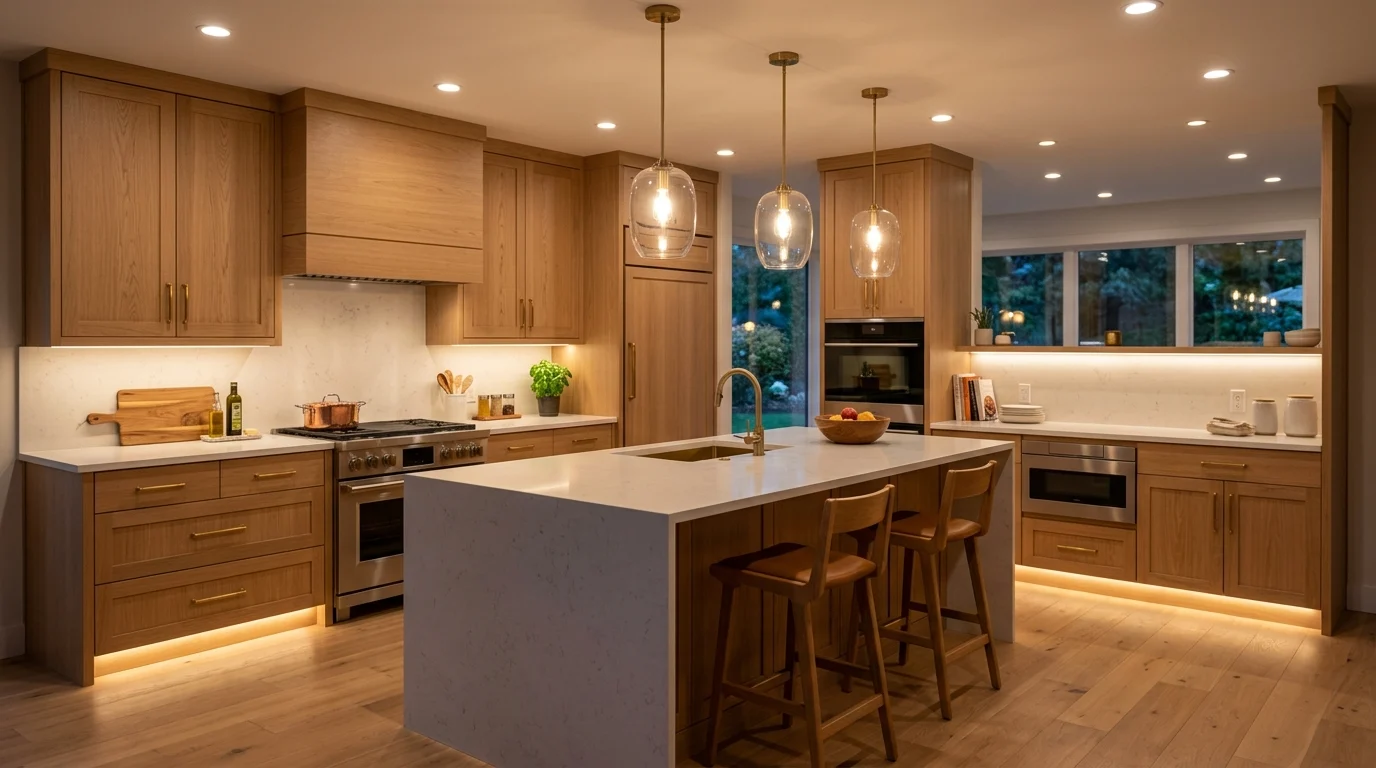
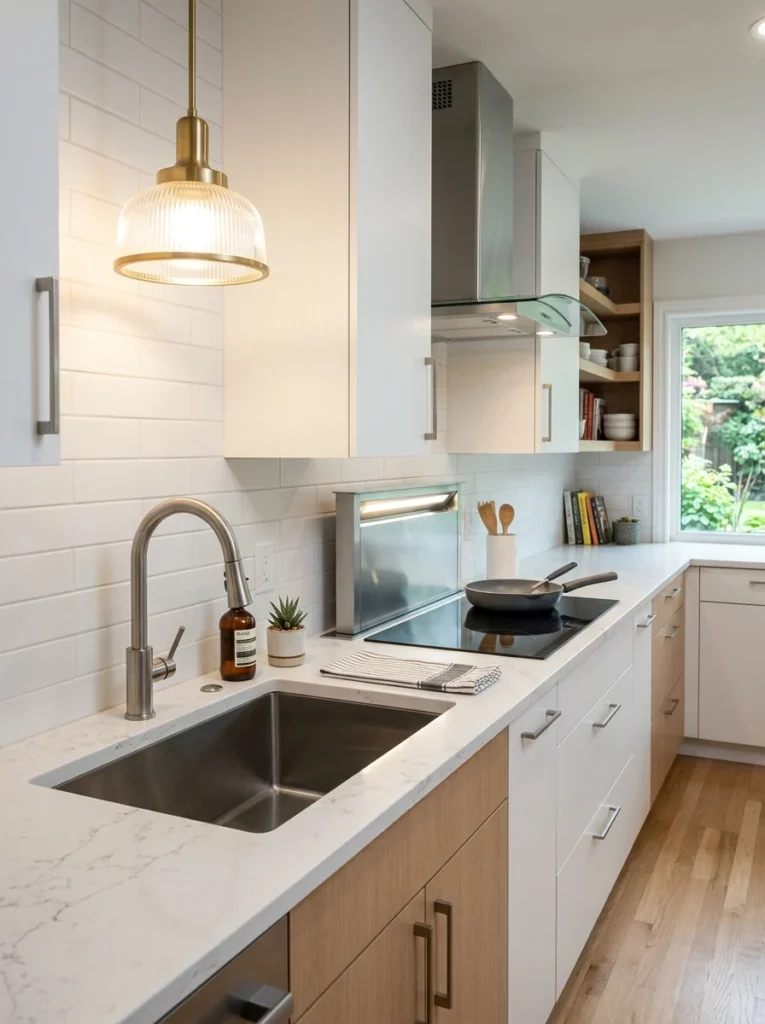
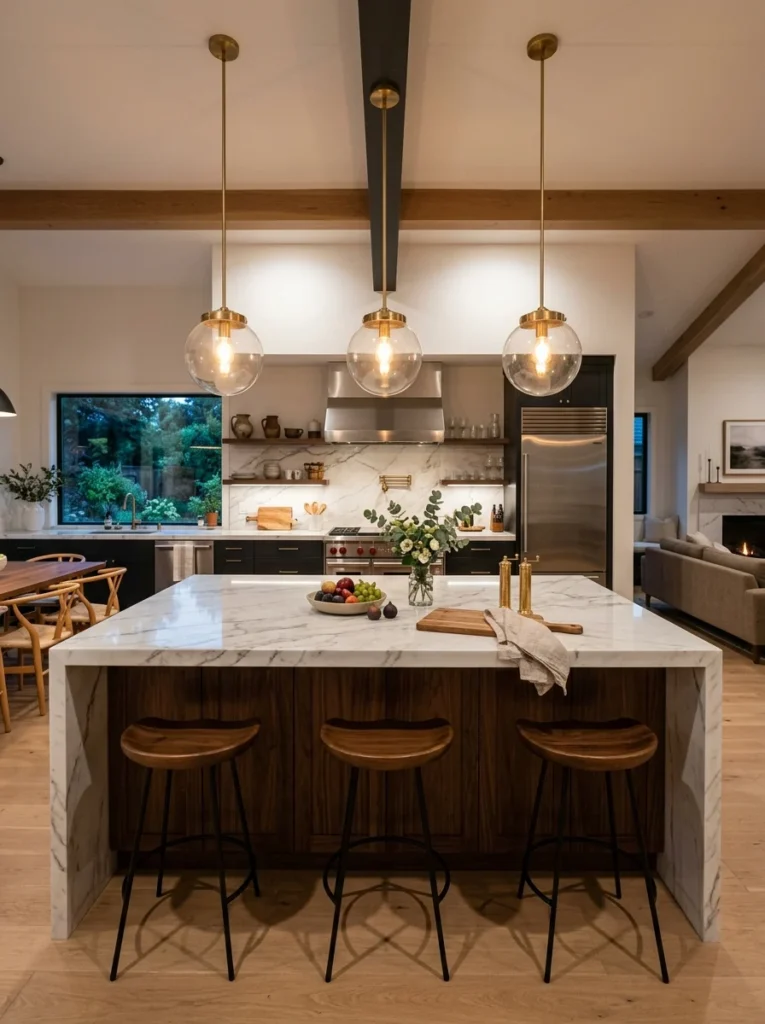
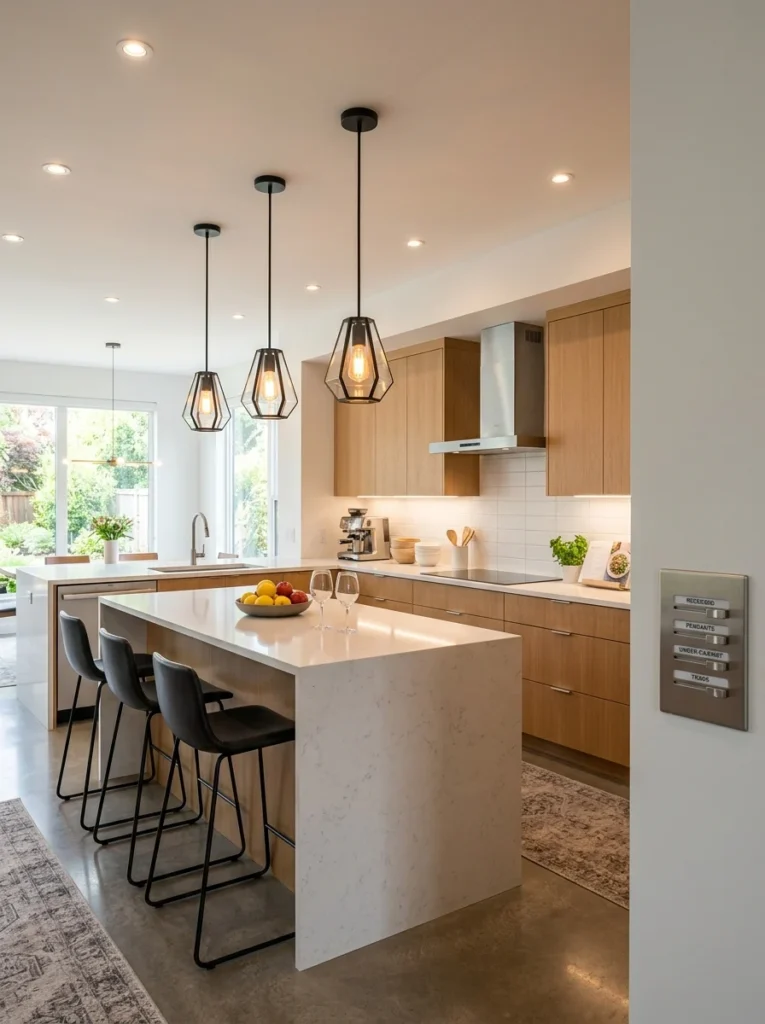
An island sits out in the middle of the room, away from the walls and often away from the main ceiling light, which makes it prone to being the darkest work surface in the kitchen, the opposite of what you want. Pendant lights hung over it fix that and double as a design feature. As a rough guide, hang pendants so the bottom sits roughly 30 to 36 inches above the surface, high enough not to bump heads or block sightlines, low enough to actually light the surface. Two or three evenly spaced pendants suit most islands better than one, so the whole length is lit rather than just the middle.
Layer two: ambient lighting
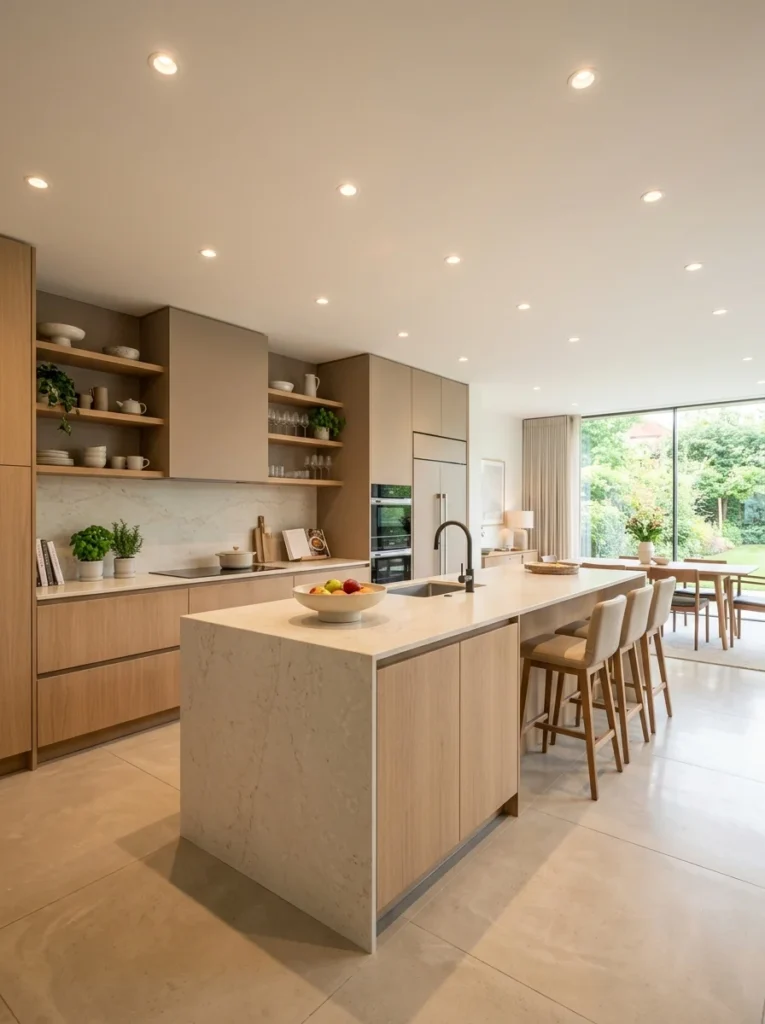
Ambient light is the general, overall illumination that fills the room and lets you see it as a whole, the base layer that keeps corners from falling into gloom. This is usually what that lone ceiling bulb was trying, and failing, to provide on its own. The fix isn’t necessarily one bigger light; it’s more even coverage. Several recessed ceiling downlights spread across the room light it far more evenly than a single central fixture, with no dark edges and no one spot where you cast a shadow over everything. A central flush or semi-flush ceiling light can work in a smaller kitchen, ideally supported by the task and accent layers so it isn’t carrying the whole load alone.
The key with ambient light is even, comfortable coverage rather than raw brightness. A kitchen lit by one very bright source has a harsh, flattening quality and hard shadows, while the same amount of light spread across several gentler sources feels soft and easy to be in. Think of ambient light as the calm, shadow-free background the other two layers sit on top of. On its own it’s a little flat and functional, which is exactly why it needs the task layer for real work and the accent layer for warmth. Together they make a room; alone, ambient light just makes a well-lit box.
Layer three: accent lighting
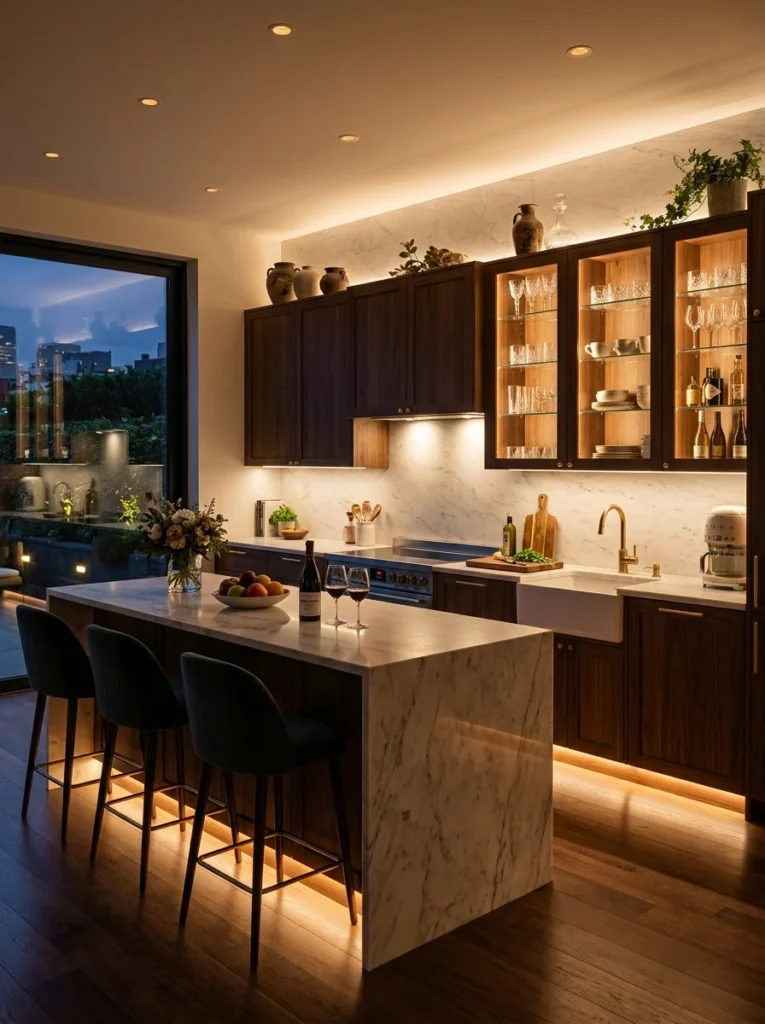
Accent lighting is the layer people skip because it isn’t strictly necessary, and it’s also the one that quietly makes a kitchen feel designed rather than merely lit. It’s the light that adds depth, warmth and a little atmosphere: the glow that turns a purely practical room into somewhere you actually want to linger. It doesn’t have to be expensive or elaborate.
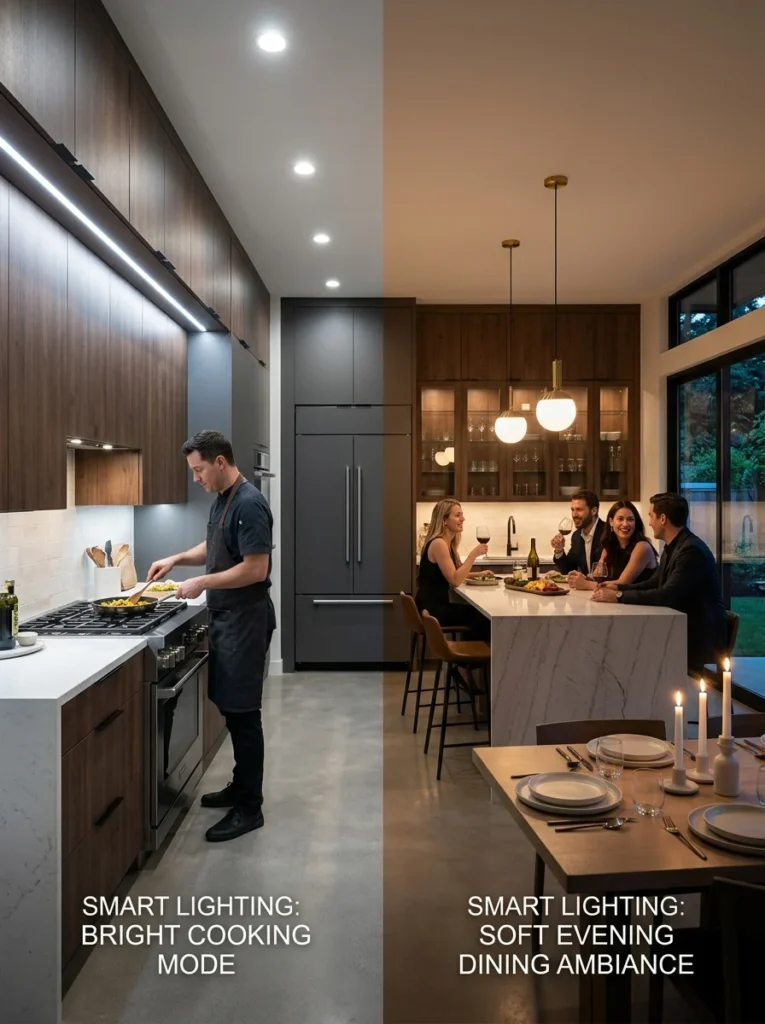
There are lots of simple ways in. A light strip inside a glass-fronted cabinet makes displayed dishes glow softly. A strip tucked above the wall cabinets, washing light up onto the ceiling, adds a gentle halo that makes the whole room feel taller and warmer. Toe-kick or plinth lighting, a low strip under the base cabinets, throws a soft wash across the floor that looks wonderful in the evening and even works as a gentle night-light. None of these light your work; that’s not their job. Their job is mood, and on a dimmer they let you drop the bright task and ambient layers right down and leave just a warm, low glow when you’re relaxing in the kitchen after dinner. That shift, from bright working kitchen to soft evening room, is the payoff of getting all three layers in.
The settings that make or break it: colour and brightness
You can install all three layers perfectly and still end up with a kitchen that feels wrong, because two settings quietly decide the whole mood: colour temperature and brightness. These are worth understanding, because getting them wrong is what makes some kitchens feel cold and clinical and others feel gloomy and dim.
Colour temperature (warm vs cool)
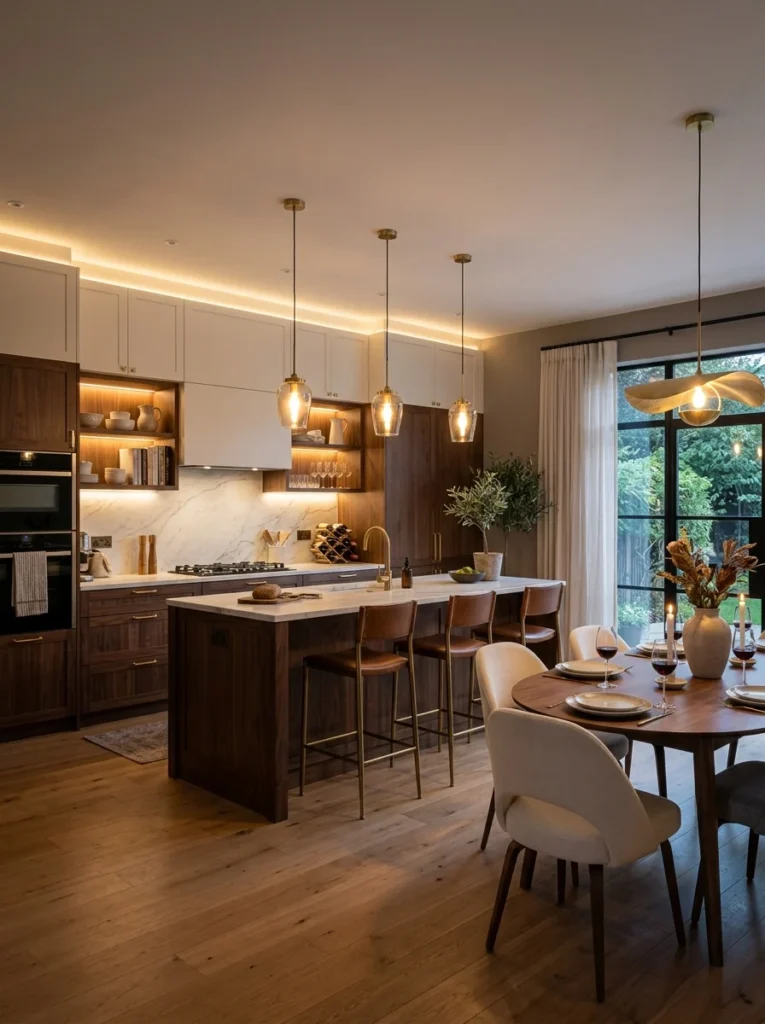
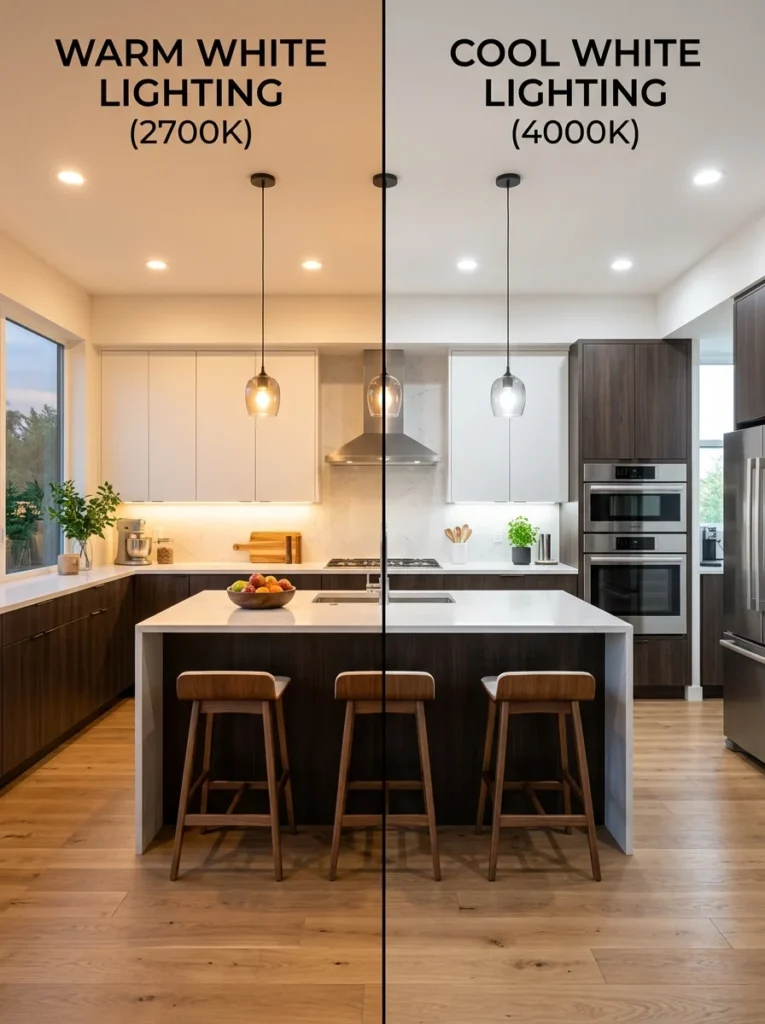
Colour temperature is measured in Kelvin, and it’s simply how warm (yellow) or cool (blue-white) the light looks. Lower numbers are warmer. Around 2700K to 3000K gives a warm, inviting, slightly golden light that suits a home kitchen and flatters both the room and the food. Push up toward 4000K and you get a cooler, brighter, more clinical white, the kind of light that can feel a touch like an office or a shop. Most people are happiest with warm white in the 2700K to 3000K range for a homely kitchen. The single most important rule, though, is consistency: pick one colour temperature and use it across all your bulbs, because mixing warm and cool light in one room is what makes a kitchen feel oddly patchy and unsettled without people quite knowing why.
Brightness and dimmers
Brightness is measured in lumens, not watts (watts only tell you energy use, not how bright a modern LED actually is). A kitchen needs plenty of light for tasks but that same level feels harsh when you’re eating or relaxing, which is the real argument for the layers being on separate controls. The best single investment after under-cabinet lighting is dimmers. Being able to run everything bright while you cook and then dim it right down for dinner turns one kitchen into two rooms. If you can put the task, ambient and accent layers on separate switches or dimmers, you get full control: blazing bright for prep, soft and low for a glass of wine at the counter, from the exact same set of lights.
Fixing a dark kitchen without rewiring
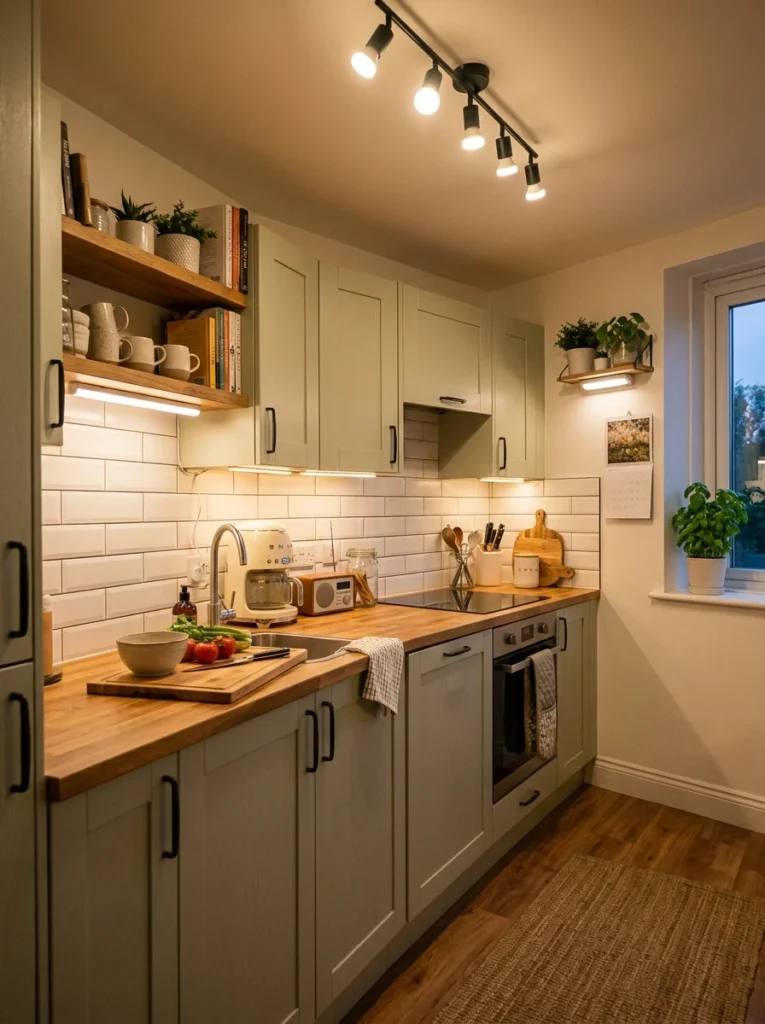
You don’t need an electrician or a renovation to transform a badly lit kitchen. My own turnaround started with things I could do myself. Plug-in or peel-and-stick under-cabinet LED strips need no wiring and fix the single biggest problem, the shadow on your worktop, for very little money. A plug-in strip on top of the cabinets adds an instant accent layer. Swapping your existing bulbs to a consistent warm-white LED at 2700K to 3000K fixes patchy, mismatched colour in an afternoon. And a plug-in dimmer or smart bulbs let you add dimming without touching the wiring at all.
If you’re able to do a little more, adding a few recessed downlights or a pendant over the island brings the ambient and task layers up to where they should be. But the point is that even renters and tight budgets can get most of the benefit. The order I’d tackle it: under-cabinet task light first, because it fixes the worst problem; then consistent warm bulbs everywhere; then dimming; then, if you can, better ambient coverage and an accent layer. Each step makes the kitchen noticeably better on its own, so you can stop whenever your budget runs out and still have gained a lot.
Lighting mistakes I made so you don’t have to
The one-bulb years were the first mistake, and the lesson there is simple: if you only have a single central light, you don’t have a lighting problem you can solve with a brighter bulb, you have a layers problem. No wattage fixes standing in your own shadow. It took me embarrassingly long to work that out.
My second mistake came after I got keen and started adding lights: I bought them at different times without checking colour temperature, and ended up with a warm bulb here and a cool one there. The kitchen felt subtly off, patchy and restless, and I couldn’t place why until I realised the lights didn’t match. I replaced them all to a single warm white and the room instantly felt calmer and more coherent. So whenever you add lighting, write down the colour temperature you’re using and stick to it for everything. It’s a tiny detail that makes a disproportionate difference, and it’s far easier to get right at the start than to chase down and fix later.
Common kitchen lighting questions
What is the best colour temperature for kitchen lighting?
For a homely, inviting kitchen, warm white in the 2700K to 3000K range suits most people, flattering both the room and food. Cooler 4000K light is brighter and more clinical, which some prefer for pure task visibility. Whichever you choose, use the same temperature throughout, since mixing warm and cool light makes a room feel patchy.
What is the single most useful kitchen light to add?
Under-cabinet task lighting. Upper cabinets cast a shadow over the worktop directly below, exactly where you prep, and a strip of light underneath removes that shadow completely. Many versions are plug-in or peel-and-stick and need no wiring, making it the highest-impact, easiest upgrade in most kitchens.
How high should pendant lights hang over an island?
Hang them so the bottom of the pendant sits roughly 30 to 36 inches above the island surface. That’s high enough to keep sightlines and heads clear, and low enough to actually light the surface. For a longer island, two or three evenly spaced pendants light it better than a single fixture.
Do I really need dimmers in a kitchen?
They’re one of the best value additions after task lighting. A kitchen needs bright light for cooking but that level feels harsh for eating or relaxing, and dimmers let the same lights do both. If rewiring isn’t an option, plug-in dimmers or smart bulbs give you dimming without touching the wall switches.
Light your kitchen in layers, not with one bulb
If your kitchen only has one light, you already know the fix, and it’s not a bigger bulb. It’s layers. Task light where you work so you never stand in your own shadow, ambient light spread evenly so there are no gloomy corners, and a touch of accent light for warmth and atmosphere, all in a single consistent warm-white colour and, ideally, on dimmers so the room can shift from bright workshop to soft evening retreat. You can start with a plug-in under-cabinet strip this weekend and build the rest over time. Every layer you add makes the room better, and together they change a kitchen more completely than almost anything else you could spend the money on.
Start with the under-cabinet light and one consistent warm bulb everywhere. That alone lifted my kitchen out of its one-shadow gloom, and it’s the cheapest, fastest place I know to begin turning a poorly lit kitchen into one that’s a pleasure to cook and sit in.